Modular processing - your first synth
→ Tap on pad 1 to select the first track.
→ Tap on the (+) button to add the first module.
You will see the modules browser open. Modules are divided into categories and sub categories.

→ Tap on "Oscillator
Now our rack contains a constantly buzzing oscillator.
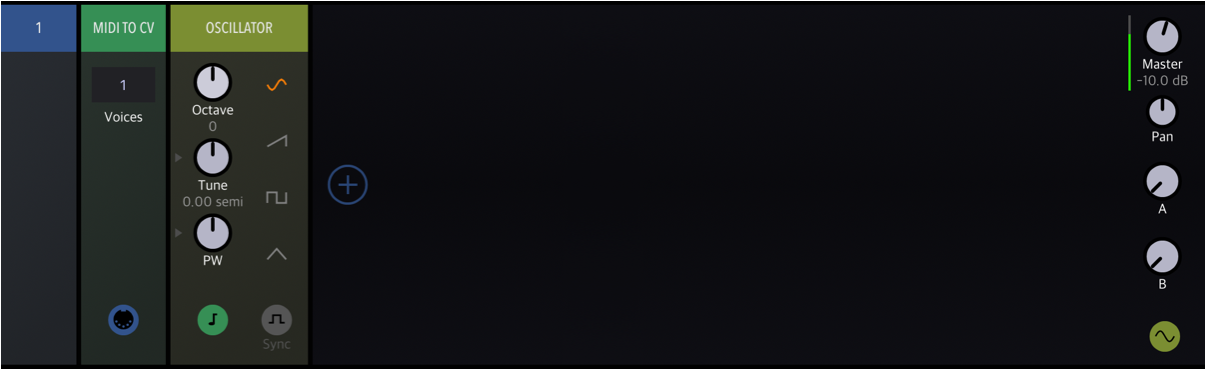
We need to control the volume envelope.
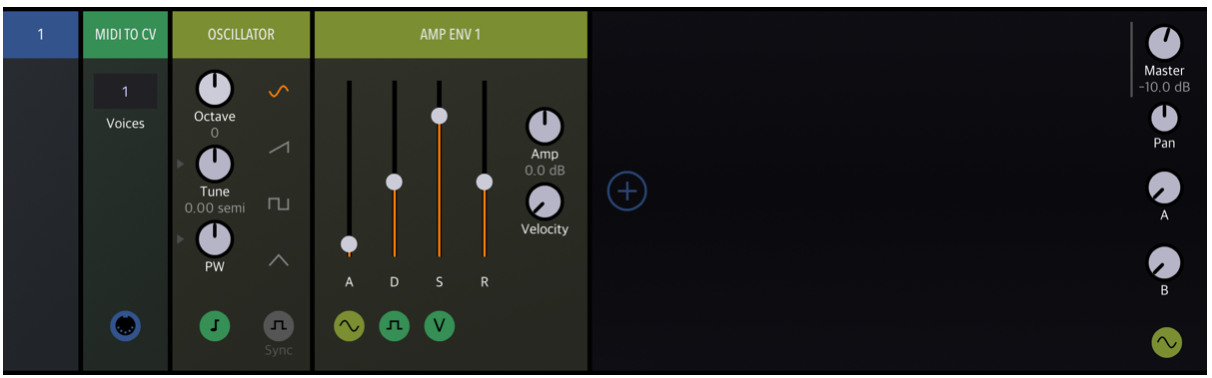
→ Tap (+) again and select "Amp env ADSR" from the PROCESSOR / AMP section.
Bravo! You've just made your first synth.
Did you notice that when you added modules, Drambo connected them for you automatically?
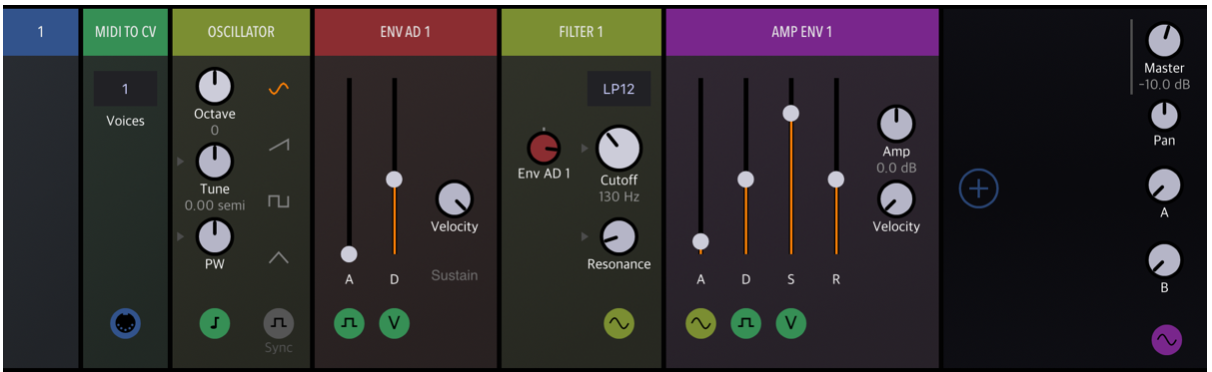
Now let's take a look at existing connections.
What you see is an internal rack hosted by Track 1 module. (Yes, Tracks are modules too!). The blue bar on the left is the rack internal output and configuration section. Then we have MIDI to CV module, that converts track MIDI signal to corresponding CV outputs: gate, pitch and velocity. Then we have the Oscillator module (light gren). Its pitch input (with note symbol) is gren, that means that it is connected to the pitch output of the first green module on the left, which is the MIDI to CV. So the oscillator pitch is controlled by MIDI to CV pitch output.
→ Tap on the Oscillator pitch input. You see the blinking output socket to which the input is connected to. You can tap on another input to change the connection, but we'll leave it like this for now.
Then we have Amp ENV 1. It has the same color as the Oscillator which means that its main input (audio) is connected to the Oscillator. Amp ENV gate and velocity inputs are blue because they are connected to corresponding track output sockets.
An essential concept in Drambo's design is the automatic connection of modules when they're added: Whenever you add a new module, Drambo will try to connect its input(s) to the respective output(s) of previous modules on the same track.
Drambo will never auto-connect a module's input to the output of a subsequent module.
Change oscillator type to SAW - let it buzz.
Let's add a filter module. We want the filter before AMP env 1.
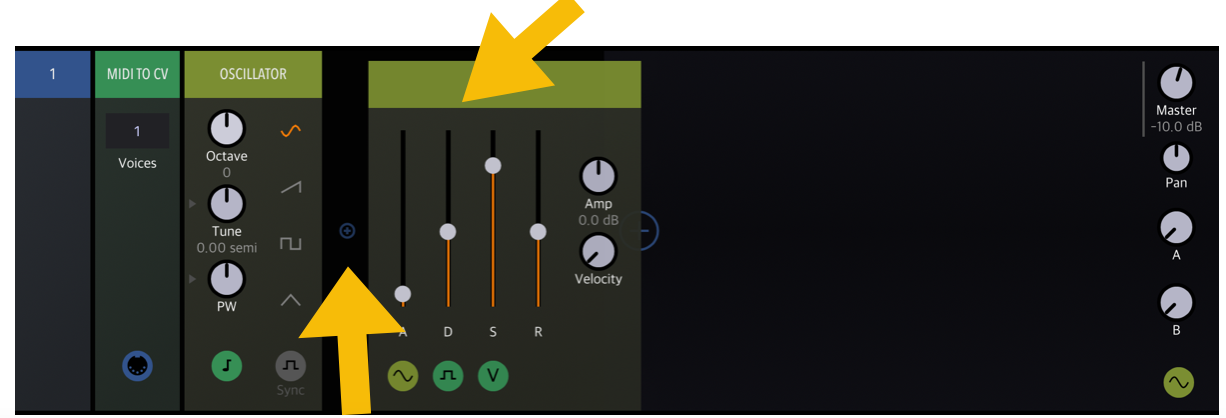
To insert a new module between others, drag one module's header until you see a gap with a blinking (+) sign between them.
Slide AMP ENV 1 module header slightly right, until you see a blue (+) sign blinking in a gap, raise your finger.
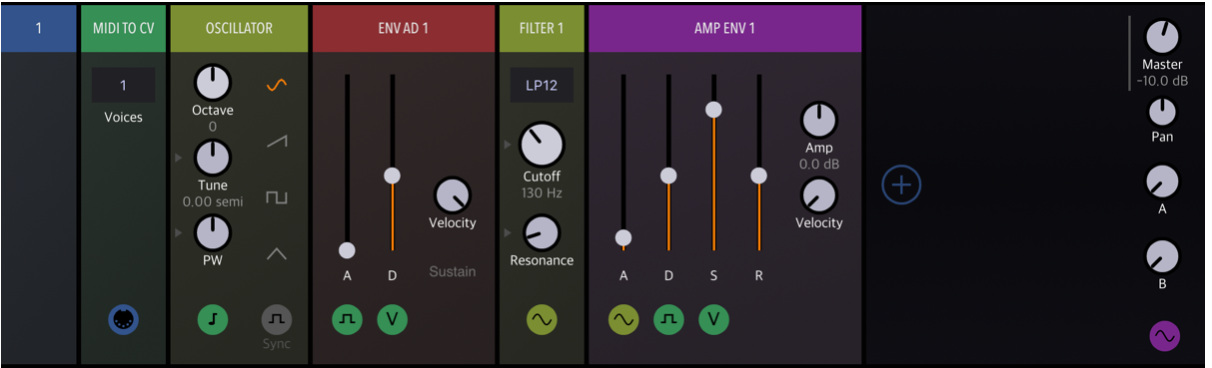
Now select Filter module from PROCESSOR / FILTER section of library browser.

You've just inserted a filter between oscillator and amp env 1 and Drambo made all necessary connections for you.
Play with filter cutoff and resonance. You can select different filter types, but let's just use LP12 for now. (A Low Pass filter with 12db/octave roll-off).
Let's modulate the filter with an Envelope generator.
Using the same gesture, insert Env AD module from the MODULATOR / ENVELOPES section, between Oscillator and Filter modules.
It still sounds the same. Why?
The newly added ENV AD modulator module is violet and you see no violet inputs, so our modulator is not connected to anything.
We want the Filter Cutoff knob to be modulated by ENV AD module. Knobs with a triangle symbol on the left are modulatable.
→ Tap on the filter's "Cutoff" knob to connect a new modulation source.
The Drambo interface now switched to connection mode. All modules that can be connected changed their appearance and also show available output sockets.

Tap on the ENV AD output socket. A new modulation knob has been created for the Filter Cutoff parameter. Using this knob you set the Env AD -> Cutoff modulation amount.
If you want to cancel output selection, tap on the source knob again.
If you want to remove a modulation knob, double-tap on it and choose "Remove".
Lets add a second oscillator!
Insert Oscillator (semi) between Oscillator and Env AD
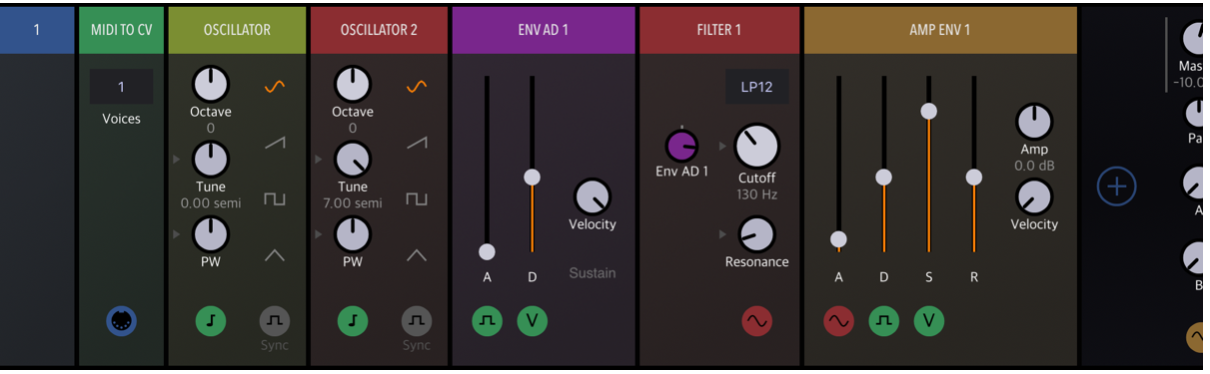
Detune them a bit using the Octave and Tune knobs. You will notice that you hear only Oscillator 2. We don't see green inputs, so nothing is connected to the first Oscillator.
Drambo doesn't know if we want to ring-modulate, frequency-modulate oscillators or just mix them. We want to mix their outputs, lets insert the Mixer module from the MIXER category.
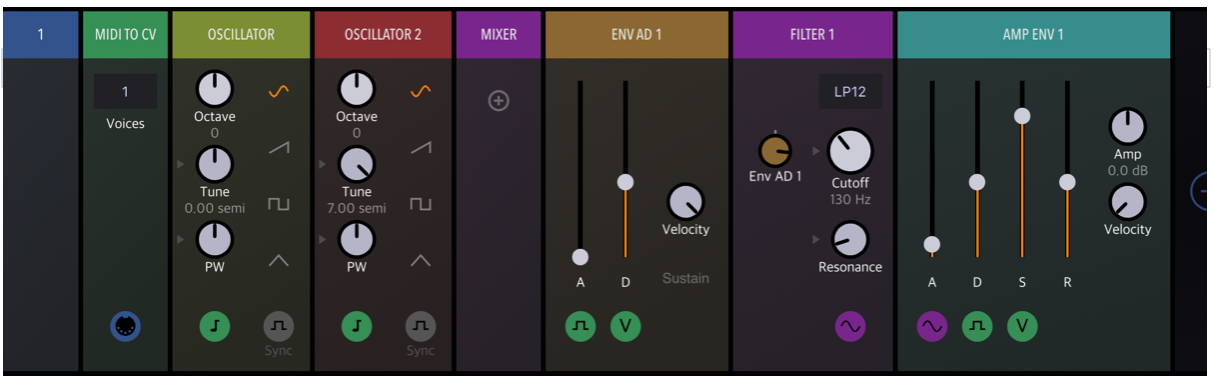
Now we hear nothing. Drambo connected the Filter output to the mixer and the mixer is not connected to anything. Tap on the (+) symbol on the mixer, then select the output of the Oscillator, then do the same for Oscillator 2.
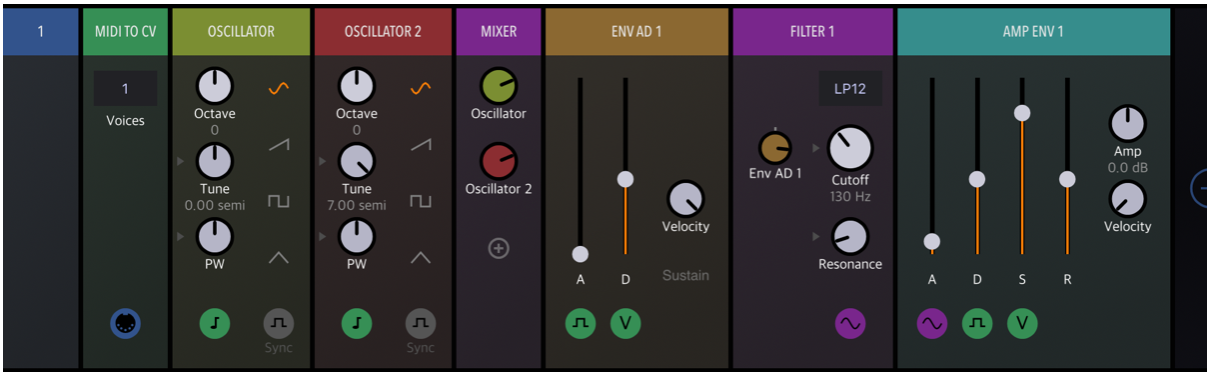
Both oscillators are connected to the mixer. You can control their levels using the corresponding knobs.
If you want to remove a source from the mixer, double tap on the input knob and select "Remove".
So far so good. We have a basic 2 oscillator subtractive synth with the filter!
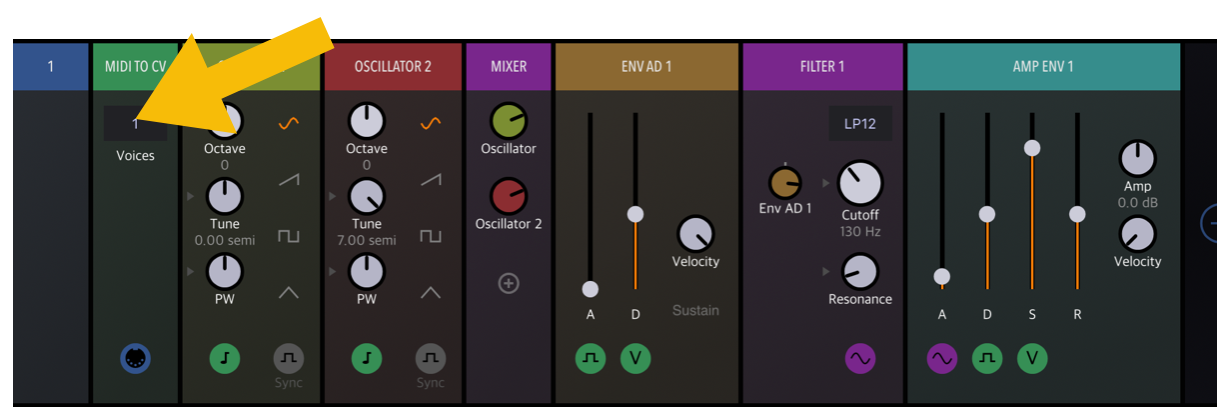
Lets make it polyphonic!
Set instrument polyphony to e.g. 3
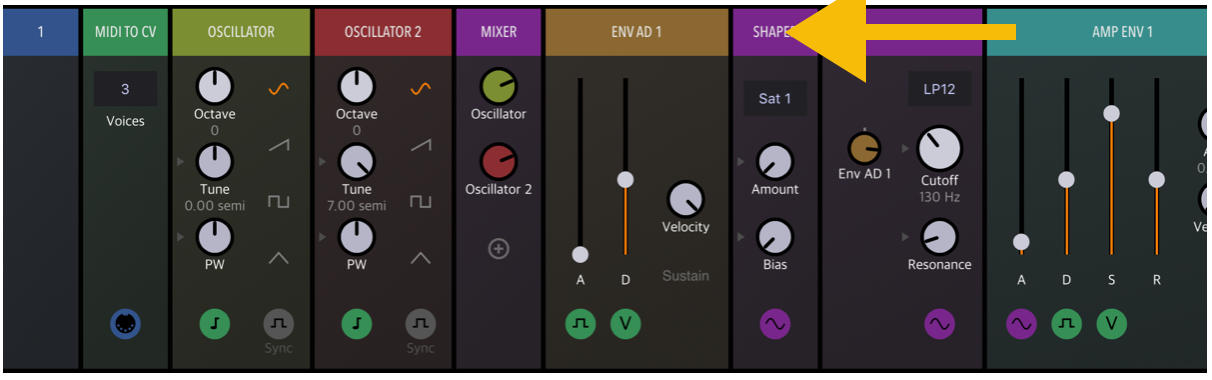
Lets spice this up and add some distortion. Insert PROCESSOR/SHAPER Shaper module at the end and play with amount knob.

Are you curious how it would sound if you move the Shaper module before the filter? Put your finger on Shaper module header and drag it before the filter.
To remove filter (or any module) put your finger on its header and swipe down until it disappears.
Tap on module header for additional options and help.
Double tap on a knob for additional options, like: Reset its value to default, set a numerical value or remove a modulator knob.
Let's save our synthesizer as a preset so that we can reuse it later.
To simplify later re-use of creations, you can use Instrument rack. So let's wrap our existing patch in an Instrument rack.
→ Tap and hold on the Oscillator module header (selection begin) until it turns green. You can select a range of modules, but we want all of them beginning from Oscillator, so press Select All then Cut
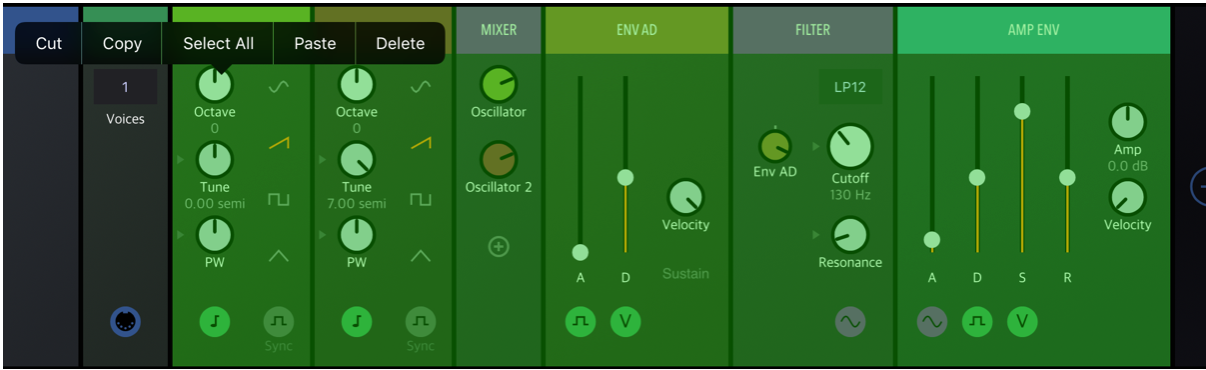
Our modules have been moded to the clipboard.
Now add an empty Instrument rack from the Generator/rack section.
When Instrument rack appears on the screen, tap on the red (+) and Paste in the bottom left corner of library browser.
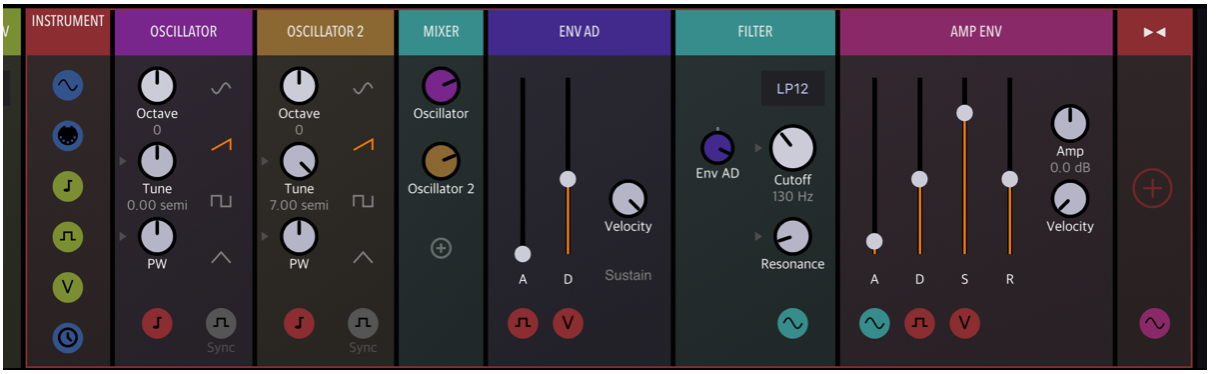
Now all of modules of our synthesizer are wrapped into Instrument rack module and can be treated as a separate module. Instrument rack has all necessary inputs that are passed to the internal rack.
Are you ready for some magic?
→ Tap on the icon located in the upper/right corner of Instrument module.
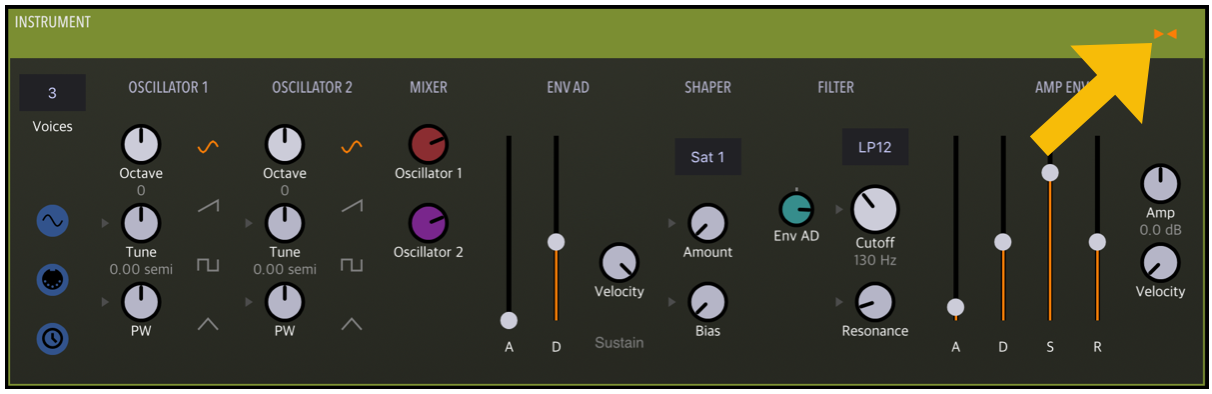
This image says everything :)
Now Instrument rack is in compact view mode.
You can also hide internal modules so they won't show in the rack's compact view. Open the internal module menu (e.g. Shaper) and choose: "Hidden in compact view".
Let's save a new Instrument rack preset.
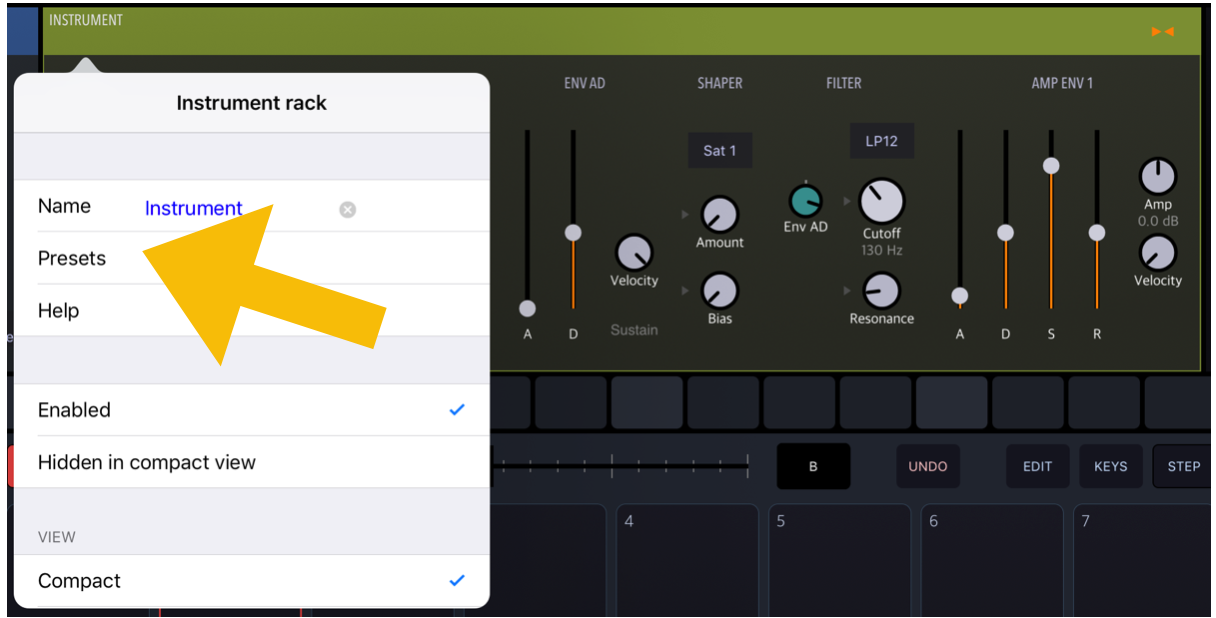
→ Tap the "Instrument" label in Instrument module.
→ Select Presets. Then select a target folder (you can create a new Folder) and hit Save in the top/right corner. Now enter your preset name and hit Enter on the onscreen keyboard. Done.
Before we move forward...
In this basic tutorial we relied mostly on automatic connections, but its not always what we want. You may connect modules in almost any way you want by tapping on the input socket and selecting any output socket you want. You could, for example, apply a filter envelope to an LFO before using it as a modulation source.
Each module has a short help available in module menu or in library browser window after selecting Help mode on the bottom bar.